
Tired of your old, worn-out driveway? Want to give your home a fresh, modern look? Look no further! A DIY resin driveway is the perfect solution. Resin driveways are popular for their durability, versatility, and aesthetics. Here's how to create your own stunning resin driveway.
Prepping the surface is the first step. Clean it properly and remove any debris or stains. Then, apply the resin mixture. This consists of resin and a hardener to help it cure and set.
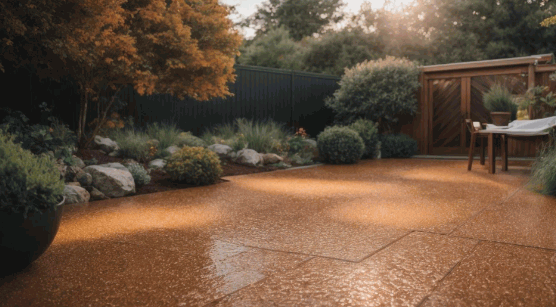
Resin driveways are customizable. Choose from a variety of colors and patterns. Go for a monochrome look or opt for vibrant colors. The possibilities are endless!
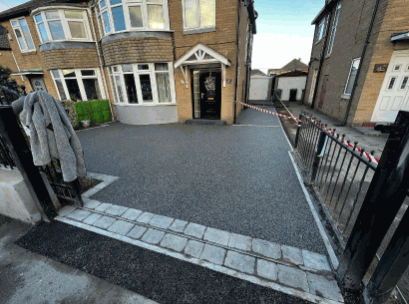
Picture pulling up to your home after a long day and being welcomed by a beautiful, crafted resin surface. It adds curb appeal to your home and makes you proud every time you come home. Transform your dull driveway into an eye-catching feature that adds value to your property. Start your DIY resin driveway project today!
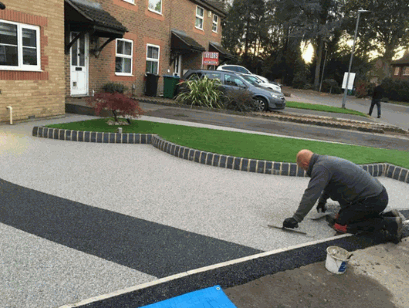
Table of Contents
A resin driveway is a modern alternative to traditional ones. It is made with aggregate (gravel or stone) and a clear resin - resulting in a smooth and durable surface. Here are some key points to know about resin driveways:
| Created by laying a mixture of aggregate and resin on a prepared base with hardcore and geotextile membranes. |
|---|
| Low maintenance - requiring minimal cleaning, no sealing or resealing. |
| Can come in various colors and finishes, allowing homeowners to customize their driveway. |
| Low-maintenance - requiring minimal cleaning, no sealing or resealing. |
| Permeable - rainwater can drain through the surface, reducing flooding and water pooling. |
| Smooth texture provides excellent grip for vehicles and pedestrians. |
Recently, resin driveways have become popular due to their aesthetic appeal and durability. Many people appreciate their sleek look and practicality.
Resin driveways have a rich history. In Ancient Rome, natural resins were used to build roads. They mixed pine resin with sand or pebbles to create sturdy roads that could handle heavy traffic. This early use of resins led to the development of modern technologies like resin driveways.
Overall, a resin driveway is an attractive way to upgrade your property. With its numerous benefits and design options, it's become increasingly popular among those seeking an innovative solution.
DIY resin driveways offer many perks to homeowners. Here are some of the main advantages to bear in mind:
Plus, resin driveways have special details that other options lack. The smooth surface gives great traction for cars and reduces the risk of slipping during wet or icy weather.
Before starting your resin driveway project, make sure to clean and level the area. This will make installation easier and improve the final result.
It's easy to see why DIY resin driveways are so popular; they are affordable and look great!
DIY resin driveways need certain materials and tools. Here's what you'll need to get your project going:
| Material/Tool | Quantity |
|---|---|
| Resin | 10 gallons |
| Hardener | 5 gallons |
| Aggregate | 100 pounds |
| Mixing bucket | 1 |
| Measuring cup | 1 |
| Trowel | 1 |
| Paint roller | 1 |
| Brush | 1 |
Each of these items is vital to making a successful resin driveway. The resin binds, the hardener helps it cure, and the aggregate gives it strength and texture.
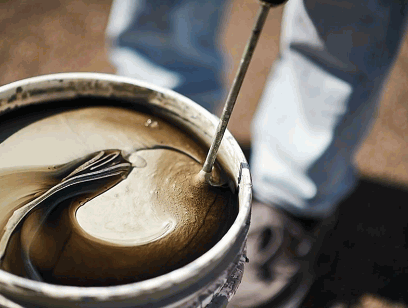
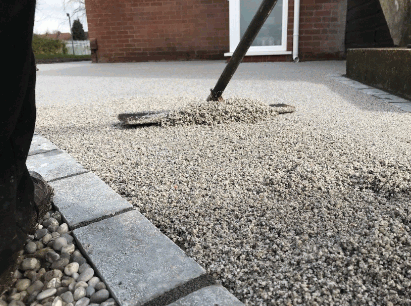
First, mix resin and hardener in the bucket as per instructions. Add the aggregate and mix until smooth.
Spread the mix on the driveway with the trowel. Use the roller or brush for a smoother finish.
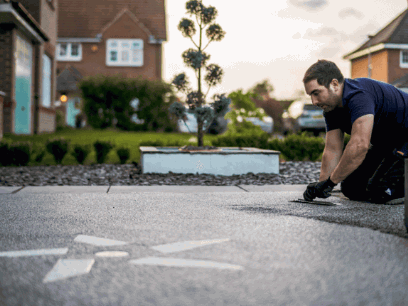
When working with resin, safety is essential. Wear gloves and goggles to protect from potential hazards.
To achieve a well-done DIY resin driveway, start with thorough preparation of the area. Clearing and cleaning the space is crucial, along with repairing any cracks or damages. These two sub-sections address the initial steps needed to ensure a solid foundation for the resin application.
Finally, enjoy an inviting entrance that adds value to your property and ensures its longevity. Get started now!
Check out: Can I Pressure Wash Resin Driveway DIY
Cracks and damages can cause hassles for driveways. It's important to fix them before continuing with preparation. Here is a guide to repairing cracks and damages:
| Step | Instructions |
|---|---|
| 1 | Clean the surface - Remove any dirt, debris, or vegetation from the damaged area. This will improve the adhesion of the repair material. |
| 2 | Assess the extent of damage - Measure the depth and width of the cracks and damages. This will help you choose the right repair method and materials. |
| 3 | Fill in cracks - For smaller cracks, use a crack filler designed for asphalt or concrete. Fill it completely and use a trowel to smooth it. |
| 4 | Patch up larger damages - If there are large potholes or extensive damage, use patching compounds or asphalt cold patch. Follow the instructions for proper application. |
| 5 | Allow time for curing - After completing repairs, let the product cure according to the recommendations. This will make repairs last longer. |
It's essential to maintain your driveway to avoid future cracks and damages. Seal existing cracks annually and address any new signs of wear and tear.
Ancient civilizations had their own ways of repairing roadways, such as filling potholes with stones or gravel, with a layer of soil or sand. Over time, engineering and construction have improved the methods for repairing driveways, making transportation networks safer and more reliable.
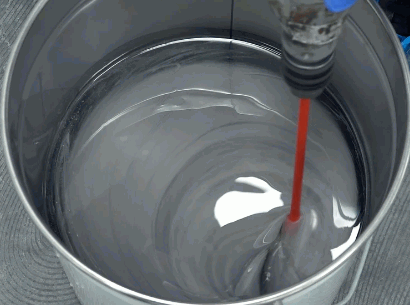
Mixing resin for a DIY driveway is super important and needs precision. Here's a step-by-step guide to help you out:
Remember, every manufacturer has different instructions for their resin product. Always refer to their guidelines for accurate measurements and times.
You may need to add additives or colorants at this stage. Follow all instructions given by the chosen product's maker.
Now you know how to mix resin properly, you can confidently start your DIY resin driveway project!
Fun fact: According to "Home Improvement Magazine," getting the right mixing technique is essential when working with resins.
To ensure a smooth application of resin for your DIY driveway project, let's dive into step 3: Applying the resin. We'll explore priming the driveway and pouring and spreading the resin. These sub-sections will guide you on the necessary steps to achieve a professionally finished resin driveway.
For priming the driveway, here are 6 steps to follow:
Don't forget to pick a high-quality primer that fits your driveway type. Priming will increase adhesion and avoid premature cracking or peeling. It's time to do something great for your driveway!
Prep the surface: Clean, dry, and dust-free. This will help the resin adhere.
Mix the resin: Follow instructions. Note any recommended ratios or mixing times.
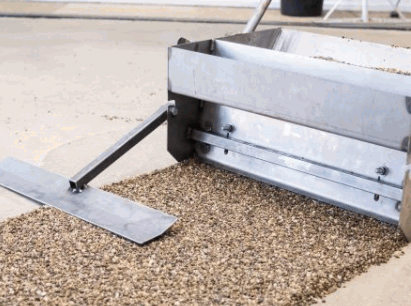
Pour the resin: Slowly pour the mixed resin onto the surface. Start in the center and spread outward.
Spread the resin: Use a spreader or brush to evenly spread the resin. Make smooth, deliberate motions.
Remove bubbles: Pass a heat gun or torch over the surface. This will help bubbles rise and pop.
Practice is key when working with resin. Have patience and keep experimenting for stunning results.
Resin pouring and spreading have a long history. Ancient Egyptians used resin for embalming and art. We continue this tradition by using modern techniques and materials to preserve items and create art.
To achieve a smooth and well-finished resin driveway surface in Step 4, level and finish it with the following sub-sections: Using a trowel to smoothen the resin and adding any desired decorative elements. These techniques will help you create a flawless and visually appealing resin driveway that meets your aesthetic preferences.
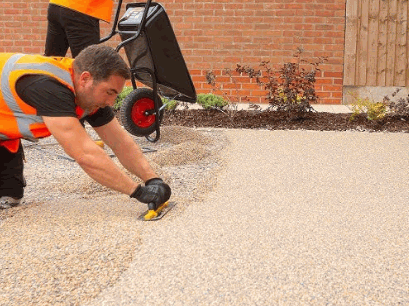
To smooth resin, use this 4-step guide:
| 1. Check that it's properly cured - firm and slightly tacky. |
| 2. Hold the trowel at an angle. Use even strokes in different directions to spread the resin. |
| 3. Clean off excess material from the trowel. Stop marks and imperfections transferring onto the resin. |
| 4. Smooth out any ridges and high spots. Use the edge of the trowel to scrape, then broad strokes to even out. |
When using a trowel, keep these tips in mind:
| 1. Pick the right size and type for your project. Viscosity and drying time matters. |
| 2. Maintain consistent pressure and movement. Don't press too hard or drag it. |
| 3. Inspect progress and adjust as you go. No areas should be missed or left uneven. |
Follow these guidelines and use a trowel to get a smooth, level surface. It takes patience and precision, but the outcome is worth it.
Add a creative touch or personalize your surface with decorative elements! Here are some tips to consider:
Pro Tip: Test the elements on a small, inconspicuous area first.
To ensure proper curing and drying of your resin driveway, follow these key steps. Allowing the resin to cure is crucial for achieving a strong and durable surface. Additionally, we will provide tips for ensuring proper drying that will result in a smooth and flawless finish.
Steps to properly cure your workspace:
Proper curing is key for great results.
To speed up curing, use a heat gun or heat lamp. Do not overheat it though; this can cause warping and cracking.
Proper drying is essential for the final curing stage. To get the best results, follow these five steps:
| Steps | Procedure |
|---|---|
| 1. Ventilation | Open windows or use fans to let air flow. This helps the process and stops moisture build-up. |
| 2. Temperature | Keep the environment at 50-70 degrees F. Too much or too little heat will affect the drying unevenly. |
| 3. Sunlight | Direct sunlight causes discoloration and uneven drying. Place items in the shade or cover them with a cloth to protect them from UV rays. |
| 4. Turn items | Rotate the items regularly to make sure one side doesn't dry faster than the other. |
| 5. Patience | Allow enough time for the drying process. The duration depends on humidity, material thickness, and environmental conditions. |
Additionally, remember to check if the material needs any special drying requirements.
Properly dried items last longer and remain in good quality.
The Drying Technology Institute states that suitable conditions during drying ensure excellent results and reduce potential damage from improper storage.
Resin driveways are an awesome DIY project! Transform the look and usefulness of your outdoor space by following the steps we have outlined. Create a stunning driveway that will last and be budget-friendly.
We have gone through choosing materials, calculating quantities, preparing the surface, and applying the resin. Plus, we have tips to get a professional finish.
Remember, proper aftercare is important too. Cleaning and resealing now and then will protect against stains, cracks, and fading caused by sunlight and bad weather.
Why wait? Gather materials and begin renovating your driveway. You'll love the change it makes to your house. Don't be scared - our guide has all the information you need! Start today!