
Plaster skimming is a technique used to create a smooth and flawless finish on walls. In this article, we will discuss the process of skimming, including the tools required, wall preparation, plaster mixing, application, and finishing.
Whether you're a DIY enthusiast or a professional looking to hone your skills, this guide will provide you with all the necessary information to achieve professional-looking results. So, let's get started and learn how to plaster skim a wall like a pro!
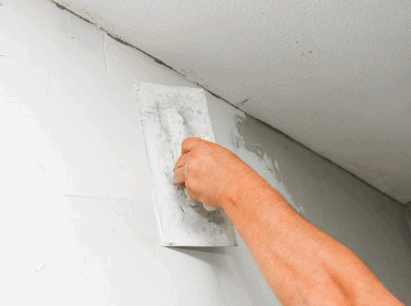
Table of Contents
Skimming, in the context of plastering, refers to the process of applying a thin layer of plaster over a wall to create a smooth and uniform finish.
This technique is commonly used for repairing imperfections or achieving a sleek, modern look. Skimming can transform rough, uneven surfaces into a seamless, polished appearance, adding value to interior spaces.
It is particularly suitable for plasterboard, drywall, and concrete surfaces and works well on both walls and ceilings. The benefits of skimming include minimizing the need for extensive preparation, reducing dust and mess, and providing a high-quality finish. In comparison to other plastering methods like rendering or pebble dashing, skimming offers a finer, more refined outcome.
Discover: How To Fit Plaster Ceiling Rose
Skimming is necessary to address imperfections, uneven surfaces, or previous damage on a wall, creating a seamless and aesthetically pleasing result.
This technique is commonly used in renovation projects where existing walls may have flaws, such as cracks, dents, or irregularities. By applying a thin layer of joint compound or plaster, the surface can be smoothed out, allowing for a flawless finish when repainting or re-wallpapering.
Skimming is also essential when transitioning between different materials, such as plasterboard and plaster, ensuring a uniform appearance. In professional painting projects, skimming is frequently employed to prepare surfaces for a fresh coat of paint, ensuring a flawless and professional finish.
Several tools and materials are essential for achieving a successful plaster skim, including a trowel, plastering float, mixing bucket, and sandpaper.
Plastering tools serve specific purposes in the plastering process. A trowel is used for applying and smoothing the plaster, while a plastering float helps achieve a smooth and even finish.
The mixing bucket is vital for preparing the plaster mixture to the right consistency, ensuring proper adhesion and workability. Sandpaper comes into play for refining the surface after plaster application, enabling a flawless and polished outcome.
Choosing the right tools based on the specific job requirements is crucial for efficiency and precision in plaster skim applications.
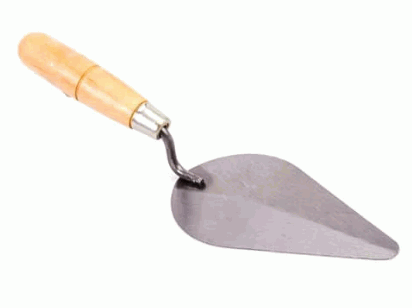
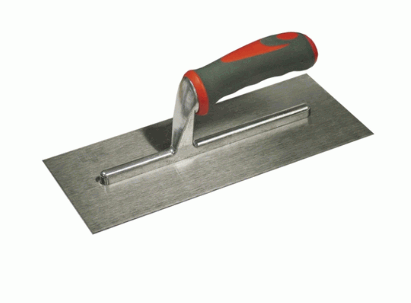
The trowel is a fundamental tool in plastering, essential for applying and smoothing the plaster onto the wall with precision and expertise.
In plastering, there are various types of trowels, each with a specific function. For instance, a finishing trowel is perfect for creating a smooth and even finish, while a corner trowel is designed for reaching tricky corners and edges.
It's crucial to choose the appropriate trowel for the job to achieve professional results. Mastering the correct trowel techniques, including holding the tool at the right angle and applying consistent pressure, is essential in achieving a seamless and professional plaster application.
A plastering hawk is a versatile tool used to hold and mix plaster whilst providing a convenient surface for smooth and efficient application on the wall.
The purpose of the hawk is to help professionals or DIY enthusiasts achieve a consistent and homogeneous plaster mix by allowing them to easily manipulate and control its texture. It enables the user to scoop up an appropriate amount of plaster, mix it, and then apply it in a controlled manner.
By using a hawk, the plasterer can maintain a steady application rhythm, ensuring a uniform coat. This tool is essential for achieving a professional finish whilst minimizing wastage of plaster material.
The plasterer's brush is a specialized tool designed for smoothing out corners, edges, and intricate details during the skimming process, ensuring a seamless finish.
The plasterer's brush is a key tool in achieving a polished result, as it effectively distributes the plaster and refines the surface. To ensure an even finish, it's important to maintain a steady hand and apply consistent pressure while using the brush. Gradually building up thin coats of plaster can also help achieve a smooth, flawless appearance. Additionally, precise maneuvering of the brush can smooth out corners and edges, resulting in a professional and refined look.
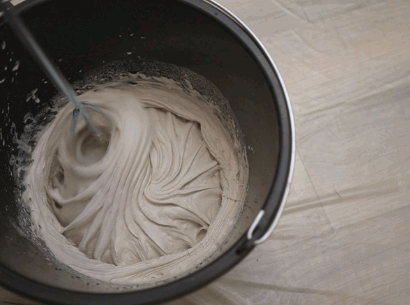
A mixing bucket is an essential component for preparing the plaster mix. It ensures proper consistency and facilitates a smooth and uniform application process.
Using a mixing bucket allows for precise measurement of water and plaster, resulting in the desired consistency. This facilitates thorough mixing and eliminates lumps or dry patches, resulting in a homogeneous mixture.
Proper mixing techniques, such as gradually adding plaster to the water and mixing slowly to avoid air bubbles, are crucial for achieving a smooth and workable plaster mix. The use of a mixing bucket greatly influences the quality of the plaster application, resulting in a professional finish and long-lasting results.
The plastering float is a crucial tool for achieving a smooth, even finish during the plaster application, ensuring professional results with proper technique.
A plastering float is a tool designed to level and smooth the surface of freshly applied plaster. It works by consolidating and compacting the material, allowing the worker to manipulate it for a uniform and seamless appearance.
The flat and smooth surface of a plastering float provides precise control over the smoothing process, resulting in a flawless finish on walls and ceilings. This tool is especially useful in achieving a consistent texture and thickness, ensuring a high-quality end result.
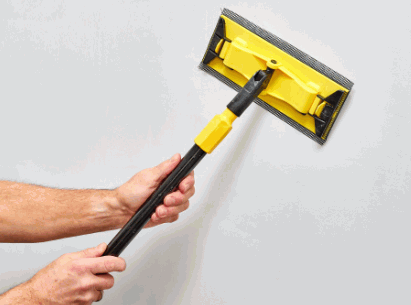
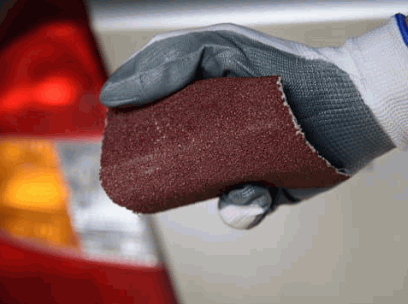
Sandpaper plays a critical role in the finishing stage of skimming, enabling the smoothing and refinement of the plastered surface for a flawless result.
When it comes to sanding, selecting the appropriate grade of sandpaper is key. Coarse grades are best for removing excess material and evening out uneven surfaces, while finer grades are perfect for achieving a smooth finish.
Remember to apply even pressure and use long, smooth strokes whilst sanding to avoid creating uneven patches. Consistent sanding not only results in a polished finish but also helps maintain the integrity and durability of the plastered wall over time.
Preparing the wall for plastering involves thorough cleaning, repairing any damages, and applying a suitable undercoat to ensure optimal adhesion and finish.
Thorough cleaning is essential to remove any dirt, dust, or grease that might hinder the adhesion of the plaster coat.
Repairing any damages, such as cracks or holes, ensures a smooth and uniform surface for the plaster coat application.
The application of a suitable undercoat enhances the bond between the plaster coat and the wall, providing a strong foundation for the finish.
Selecting the right undercoat is crucial, considering factors such as the wall material, porosity, and the type of plaster coat to be applied. This ensures the best results for your plastering project.
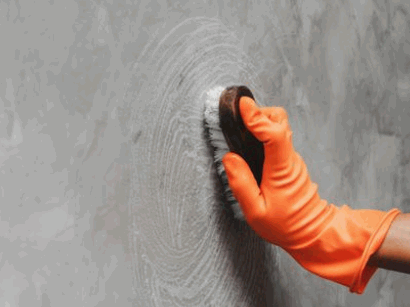
The initial step in wall preparation for skimming is to thoroughly clean the surface, removing any dust, debris, or contaminants that may affect the plaster adhesion.
This is crucial because the cleanliness of the surface directly impacts the quality and durability of the skimmed finish. Dust and debris can compromise the adhesion of the plaster, leading to potential cracks and uneven surfaces.
To ensure a smooth and flawless outcome, it's essential to employ effective cleaning methods such as vacuuming, wiping with a damp cloth, or using a mild detergent solution. A clean substrate provides a solid foundation for the skimming process, allowing for optimal adhesion and a professional, long-lasting finish.
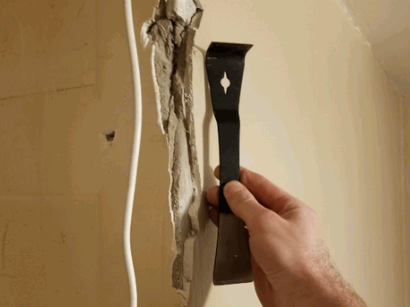
Addressing any wall damages, such as cracks or imperfections, is crucial to ensure a seamless skimming process. This involves patching, smoothing, and leveling as needed.
Before beginning the skimming process, it is crucial to prioritize repairing any walls that may have existing flaws. These imperfections can greatly affect the final outcome, so it's important to address them beforehand.
When patching damaged areas, it's essential to use the right materials and techniques to ensure a durable and smooth surface. This includes smoothing out irregularities and leveling any uneven sections. These steps contribute to creating a uniform and flawless base for the skim coat. A well-prepared wall not only enhances the overall aesthetic appeal but also helps the skim coat adhere and last longer.
Applying a suitable primer is essential to seal the wall, promote adhesion, and prepare the surface for the plaster application, ensuring a durable and uniform finish.
When choosing a primer, it's crucial to consider its compatibility with the specific surface type. This ensures optimal adhesion and durability. For plasterboard, a water-based primer with stain-blocking properties is recommended. It effectively seals the porous surface and creates a smooth base for painting.
For timber surfaces, an oil-based primer is ideal as it penetrates deeply and helps prevent tannin bleed. When dealing with metal surfaces, a rust-inhibiting primer is essential for long-term protection against corrosion. Additionally, using a primer with adhesion promotion capabilities can enhance the bond between the surface and plaster, extending the finish's lifespan.
Mixing plaster requires a precise technique and proper consistency to achieve an optimal blend suitable for the skimming application process.
To begin, measure the required amount of plaster and water with precision for the desired consistency.
Slowly add the plaster to the water, ensuring it absorbs without forming lumps. Use a mixing paddle to gently blend the materials, being careful not to introduce air bubbles.
Continue mixing until a smooth, lump-free texture is achieved. It is essential to test the spreadability and thickness of the mixture before application to ensure proper adhesion.
A well-mixed plaster will result in a flawless finish and increased durability for the surface.

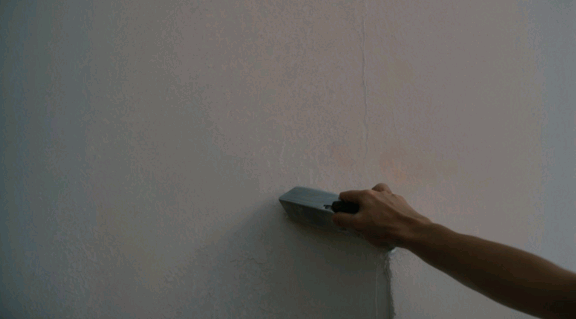
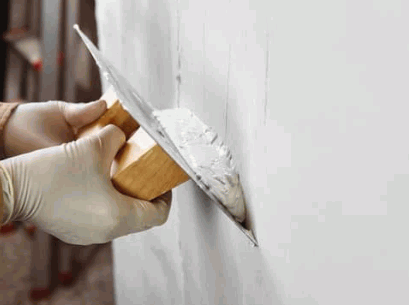
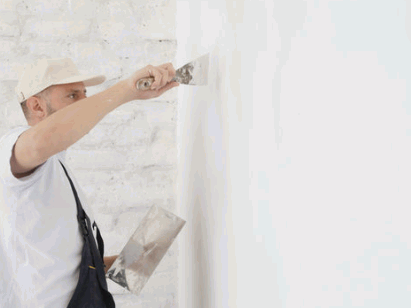
The application of plaster involves specific techniques for achieving a smooth, uniform result, including the use of a trowel and the application of a skim coat for evenness.
This process begins with preparing the surface to be plastered by cleaning and dampening it. The plaster is then mixed to the right consistency before being applied in thin layers.
Smoothing and leveling techniques are used to ensure even distribution and to remove any imperfections. The skim coat, a thin layer of plaster, is then applied to achieve a seamless finish, covering any small blemishes or unevenness. This final step plays a crucial role in achieving a flawless and polished look.

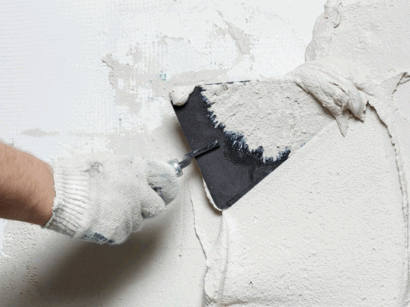
The first coat of plaster is applied using specific techniques to create an even base, requiring precision and expertise for professional results.
Before applying plaster, it's important to prepare the surface properly. This includes ensuring it is smooth and even. The consistency of the plaster mix and the angle of the trowel are key factors in achieving a uniform coat. Skilled plasterers know how to control the pressure and angle of the trowel to distribute the plaster evenly, avoiding any lumps or bumps.
Paying attention to detail during the application process is crucial. This helps minimize the need for excessive sanding and refinishing. Professional plasterers are known for their precision, which sets them apart from amateur attempts. The level of precision can greatly impact the final appearance and structural integrity of the surface.
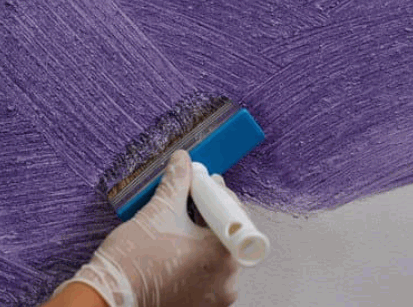
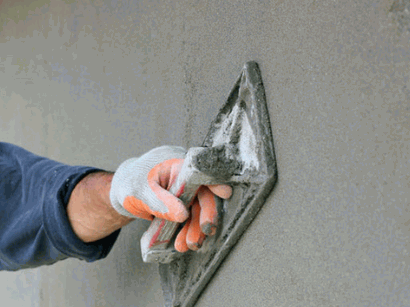
Smoothing out the plastered surface is a critical step in achieving a flawless finish. This requires effective techniques and the use of a plastering float for optimal results.
When it comes to plastering, a smooth surface is key to achieving a visually appealing wall or ceiling. Imperfections and blemishes can detract from the overall aesthetics, so it's important to ensure the surface is free from these flaws. Techniques like feathering, skimming, and trowelling are effective in creating a smooth surface.
The plastering float is a crucial tool in this process. It's a flat surface and sharp edges allow for refining the finish by leveling and smoothing the plaster. Its ergonomic design provides precise control, resulting in a uniform and professional-quality outcome.
The second coat of plaster is applied to achieve an even finish. This step requires attention to technique and precision for a professional-quality result.
Applying the second coat is a critical step in the plastering process. It allows for refinement and enhancement of the surface.
Before proceeding with the second application, it's important to ensure that the first coat has fully dried. When applying the second coat, focus on refining the technique. Use smooth and consistent strokes to create a seamless finish. Precision is key - paying attention to details such as edges and corners ensures a uniform and polished appearance.
Taking the time to perfect the second coat ultimately contributes to achieving a professional-grade result.
Tidying up the edges of the plastered surface is essential for achieving a seamless and polished result. This process, commonly referred to as edge tidying, requires precision and attention to detail.
Edge tidying plays a crucial role in the overall finish of any plastering project. To ensure professional outcomes, it's important to refine the technique by using specialized tools and paying close attention to the angles and contours of the surface. Precision is key, as even the slightest imperfection can stand out once the paint or finish is applied. Taking the time to master the art of edge tidying can elevate the quality of the work and leave a lasting impression on clients and observers.
The finishing stage of skimming involves sanding the surface, applying a final coat, and preparing the wall for painting to achieve a polished and enduring result.
Sanding is a crucial step in the painting process. It smoothens the surface, removing any imperfections and ensuring a seamless finish.
Once sanded, it's important to apply a final coat of compound or joint compound. This helps to level and blend any unevenness, creating a smooth base for painting.
Prior to painting, it's essential to thoroughly clean the surface to remove any debris. Additionally, a primer should be applied to enhance paint adhesion.
This preparatory phase is crucial in achieving a flawless and long-lasting paint job. It elevates the overall aesthetic appeal of the space, ensuring a professional finish.
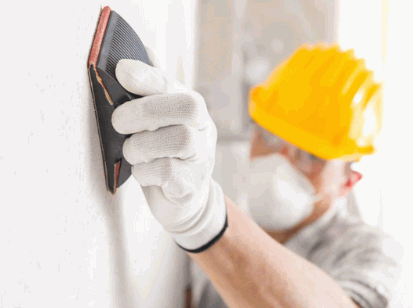
Sanding the plastered surface is crucial for refining the finish, achieving a smooth texture, and preparing the wall for the application of a final coat or paint.
When sanding, it's crucial to choose the right grade of sandpaper. Begin with a coarser grade to eliminate imperfections, then move on to finer grades for a smoother finish. Make sure to keep the sandpaper flat against the surface and move it evenly in a back-and-forth or circular motion to avoid uneven patches. It's important to be mindful of the pressure applied and work systematically for a consistent and flawless result.
A well-sanded surface not only improves the overall appearance of the final product but also promotes better adhesion for subsequent layers of paint or plaster. So take your time and sand carefully for the best results.
Applying a final coat of plaster contributes to the overall smoothness and uniformity of the wall surface, enhancing the aesthetic appeal and durability of the skimming result.
This final layer fills in any minor imperfections and ensures a flawless canvas for painting or wallpapering, creating a professional and polished finish.
The application process involves carefully spreading the plaster over the surface, paying attention to even coverage and smooth application. By sealing the surface with this final coat, the wall becomes more resistant to wear and tear, adding to its longevity.
The final coat also plays a crucial role in providing a protective barrier, safeguarding the underlying structure from moisture and external elements, and ensuring that the wall remains structurally sound.
Performing a final round of sanding after the application of the final coat ensures a smooth and flawless finish, preparing the wall for painting and long-term maintenance.
This final sanding stage is crucial for achieving professional-looking results. It helps to level out any imperfections, smooth out rough spots, and create a uniform surface for paint application.
To achieve a smooth finish, use fine-grit sandpaper and sand in a circular motion. Focus on areas with noticeable bumps or uneven textures.
After sanding, be sure to clean the wall thoroughly to remove any dust and debris. This will ensure proper adhesion of the paint and contribute to the wall's long-term durability.