
If you are looking to add a touch of elegance and sophistication to your home, then a plaster ceiling rose might be just the thing you need. In this article, we will explore the different types of plaster ceiling roses available, the tools you will need to fit one, and how to prepare your ceiling for installation.
We will also walk you through the step-by-step process of fitting a plaster ceiling rose and provide tips on how to finish it off for a polished look. Whether you are a DIY enthusiast or a homeowner looking to spruce up your living space, this guide has got you covered.
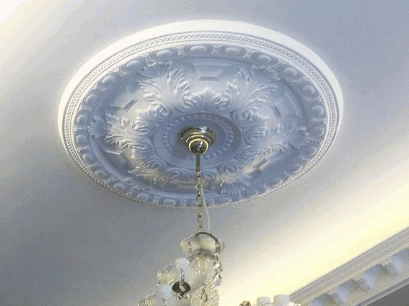
Table of Contents
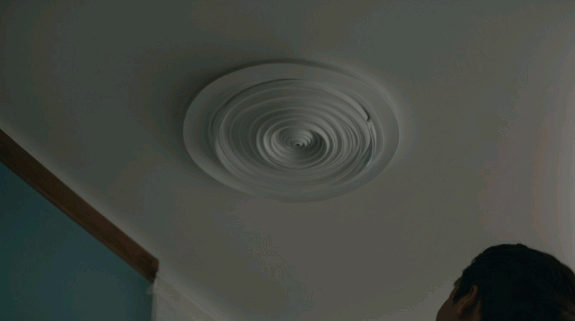
A plaster ceiling rose is a decorative or ornamental element that is mounted or attached to the ceiling, typically used for enhancing the aesthetic appeal of a room or space.
Plaster ceiling roses serve as captivating focal points, adding elegance and grandeur to any decor. They were traditionally popular in Victorian and Edwardian homes, but have recently made a resurgence in modern interior design.
These decorative features are not limited to traditional settings, as they are also incorporated into contemporary homes and commercial spaces for a sophisticated touch. While the installation process may seem daunting, it can be achieved as a DIY project with the right tools and methods. Let us guide you through the steps for a successful installation of a plaster ceiling rose in your home.
Plaster ceiling roses come in various types, including traditional, modern, and decorative variants, each designed to enhance the aesthetic appeal of interior or exterior spaces through ornamental designs and installation methods.
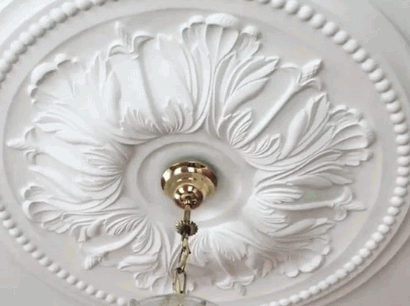
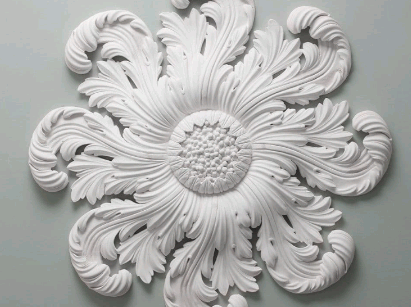
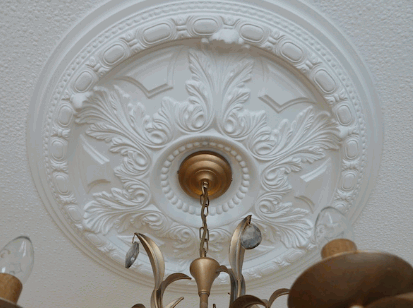
Traditional plaster ceiling roses typically feature intricate floral patterns and ornate details, reflecting a classic and timeless charm. They are often installed as a centerpiece of chandeliers, creating a grand and opulent ambiance.
Modern plaster ceiling roses, on the other hand, showcase sleek and minimalist designs, emphasizing clean lines and geometric shapes, making them suitable for contemporary or industrial-style interiors. Decorative plaster ceiling roses offer a blend of traditional and modern elements, incorporating unique motifs and embellishments to add individuality and flair to any space, whether indoors or outdoors.
The traditional plaster ceiling rose is an iconic element of interior design, featuring ornate and decorative patterns that add a timeless elegance to the ceiling.
Installation typically follows established methods and steps. These stunning plaster ceiling roses come in various sizes and designs, offering a versatile range to suit different room styles.
When installing a ceiling rose, it is essential to first prepare the ceiling surface and mark the center point for accurate placement. Using a strong adhesive, carefully affix the rose in its position, ensuring it is securely in place.
Once installed, the intricate details of the rose can be highlighted with a delicate coat of paint, creating a captivating focal point for any room.
Modern plaster ceiling roses exhibit sleek and contemporary designs, offering a minimalist yet impactful decorative touch to the ceiling. The installation methods and steps are tailored to complement modern interior aesthetics.
The clean lines and geometric shapes of modern plaster ceiling roses add a sense of modern sophistication to any room. They are the perfect choice for those seeking a subtle yet stylish design element.
Installation is a doddle with modern plaster ceiling roses, as they can be easily mounted using adhesive compounds or screws. This allows for a hassle-free DIY approach. Additionally, the lightweight nature of the material makes handling and positioning a simple task, making the installation process relatively straightforward for homeowners looking to elevate their interior spaces with a touch of modern elegance.
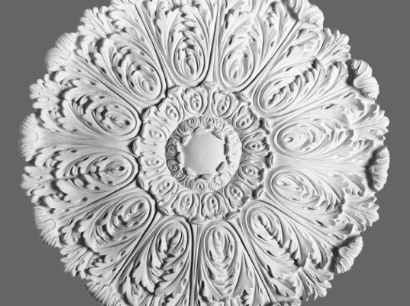
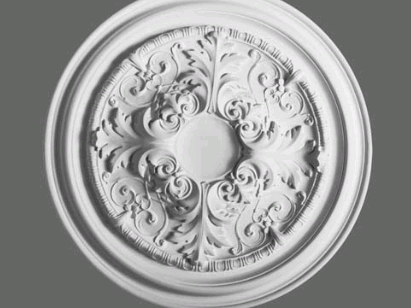
Decorative plaster ceiling roses encompass a diverse range of intricate designs and patterns, serving as captivating focal points that enhance the aesthetic appeal of both interior and exterior spaces through ornamental installation methods.
Ceiling roses are ornate architectural features that come in various sizes and styles, ranging from classical to contemporary. They add a touch of elegance to any room or exterior facade, making them a popular choice for interior designers and architectural enthusiasts. These timeless decorative pieces can be used to adorn grand chandeliers in formal dining areas or accentuate pendant lights in cozy living rooms. They are also a favorite among DIY enthusiasts, as they can be easily installed using plaster adhesives and simple tools. The intricate designs and fine detailing of plaster ceiling roses make them a versatile option for elevating the visual appeal of any living space.
Fitting a plaster ceiling rose requires specific tools and materials to ensure a secure and precise installation process.
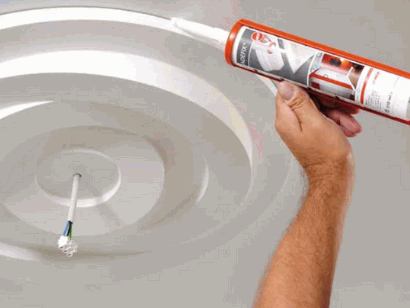
When installing a plaster ceiling rose, it's important to have the right tools on hand. These include a measuring tape, pencil, spirit level, and strong adhesive. Use a caulking gun to evenly apply the adhesive and lightweight spackling compound to fill any gaps. And don't forget a sturdy ladder and protective mask for safety and cleanliness.
With these tools and materials, you can easily and expertly install a plaster ceiling rose. This will not only enhance the aesthetic of your space but also add value to your home.
Preparing the ceiling for fitting a plaster ceiling rose involves a series of methodical steps to ensure proper positioning, attaching, and securing of the ornamental element.
Before starting the installation process, it's important to identify the center of the ceiling and check for any potential obstructions such as electrical wiring or plumbing. Clearing the area where the rose will be attached to debris and loose paint is crucial for a smooth surface.
Once the area is prepared, the rose can be securely attached using a strong adhesive. After the adhesive has been set, any gaps between the rose and ceiling can be filled and smoothed out for a seamless finish.
Measuring the ceiling accurately is the initial step in preparing for the fitting of a plaster ceiling rose, ensuring precise placement and alignment of the ornamental fitting.
To accurately measure the ceiling, start by identifying the center point where the ceiling rose will be installed.
Use a measuring tape to measure the distance from the center point to each wall, ensuring that the distances are equal for symmetrical placement. Take into account any light fittings or ceiling fans that may affect the placement.
It's essential to double-check the measurements before proceeding to ensure that the plaster ceiling rose will be perfectly positioned.
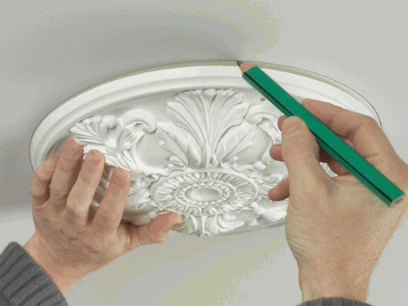
Marking the center point on the ceiling serves as a crucial reference for aligning and positioning the plaster ceiling rose accurately within the designated space.
To achieve this, begin by using a measuring tape to find the midpoint of each wall and mark it with a pencil. Then, use a chalk line or a laser level to create intersecting lines from these midpoints. The meeting point will indicate the center of the ceiling.
To ensure precision, double-check the measurements. Once you have located the center, use a small nail or tack to mark the exact spot. This method will help you maintain symmetry and ensure the perfect placement of your plaster ceiling rose.
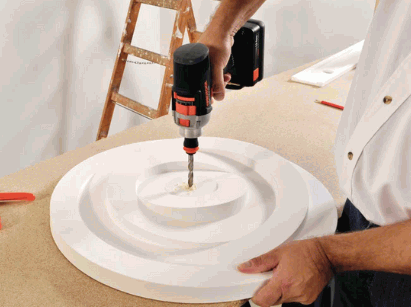
Cutting out the hole for the plaster ceiling rose ensures a proper fit and seamless integration with the ceiling surface. This process requires precision and careful execution.
Measuring the diameter of the ceiling rose is crucial to determine the size of the hole to be cut. To create a clean and precise opening, use a pencil to mark the center of the ceiling rose on the ceiling.
Next, carefully drill a small pilot hole inside the marked circle to provide a starting point for the saw. When cutting the hole, make sure the saw remains level and use smooth, controlled movements to avoid splintering the ceiling material. Once the hole is cut, sand down any rough edges and test-fit the ceiling rose before securing it in place.
Establishing a sturdy support structure is essential for ensuring the secure attachment and long-term stability of the plaster ceiling rose within the ceiling space.
One of the most common methods for providing support is to install a wooden or metal brace between the ceiling joists. This brace acts as a base for the plaster ceiling rose, distributing its weight and minimizing stress on the surrounding ceiling.
Using construction adhesive or screws to secure the rose to the brace can further enhance its stability. It's crucial to carefully measure and cut the brace to fit the dimensions of the rose, ensuring a snug and secure fit. This DIY approach requires attention to detail and precision for a successful installation.
Fitting a plaster ceiling rose requires a methodical approach to affixing, positioning, and securing the ornamental fitting in place, ensuring seamless integration with the ceiling surface.
Before beginning the installation process, it's important to accurately measure the circumference of the ceiling rose and mark the center of the ceiling. This will ensure proper placement and a secure attachment.
Next, use a strong adhesive, such as a polyurethane construction adhesive, to affix the rose to the ceiling. Press it firmly into place and hold for a few minutes to allow the adhesive to bond. For added stability, consider using screws or brackets to further secure the rose.
Before painting, it's crucial to ensure all joints are well-filled and smooth for a flawless finish. This will not only improve the overall appearance but also help with the longevity of the installation.
Applying adhesive to the back of the plaster ceiling rose is a critical step in ensuring secure affixing to the ceiling, requiring precision and attention to detail.
This process typically involves using a strong adhesive, such as construction adhesive or polyurethane adhesive, to ensure a lasting bond.
Before applying the adhesive, it's essential to clean the surface of the ceiling and the back of the rose to remove any dust or debris.
Once the adhesive is applied, carefully position the rose on the ceiling, ensuring it is centered and level.
Using gentle pressure, press the rose firmly into place, allowing the adhesive to set as per the manufacturer's instructions.
This method ensures a professional and sturdy installation of the plaster ceiling rose.
Correctly positioning the plaster ceiling rose within the designated area of the ceiling is crucial for achieving a balanced and visually appealing installation.
To begin, identify the center of the ceiling and mark it as the starting point for the installation. Measure the dimensions of the ceiling rose and the room to determine the precise placement.
Use a pencil to mark the locations where the rose will be fixed, ensuring it aligns with any existing lighting fittings. To affix the rose, apply a strong adhesive on the back and carefully press it onto the ceiling, holding it in place for a few minutes for the adhesive to set. Be mindful of any decorative patterns on the rose and align it parallel to the room's features for an aesthetically pleasing result.
Securing the plaster ceiling rose in place involves specific methods and techniques to ensure the long-term stability and durability of the ornamental fixture within the ceiling space.
When installing a plaster ceiling rose, it's crucial to start by assessing the ceiling material. This will help determine the appropriate tools needed for the job. Keep in mind that different surfaces may require different securing methods.
Some common tools that may be needed include a drill, screws, and a strong adhesive. As you affix the plaster ceiling rose, make sure to align the attachment points with the structural elements of the ceiling. This will provide ample support for the installation.
It's also important to use the right type of screws or hooks for the specific ceiling material. This will ensure a secure and lasting installation. Taking these steps will not only improve the overall appearance of the ceiling but also ensure its stability and longevity.
The finishing touches on a plaster ceiling rose to involve enhancing its ornamental and decorative appeal through meticulous attention to detail and precision.
This can be achieved by carefully sanding down any rough edges or imperfections using fine-grit sandpaper. Once the surface is smooth, applying a primer suitable for plaster surfaces will help ensure that the paint adheres evenly.
Choosing high-quality paint in a color that complements the room's decor is essential. A steady hand and a small, angled paintbrush will allow for precise application, highlighting the intricate details of the ceiling rose. For a more opulent finish, consider using metallic or pearlescent paint to accentuate the ornate features.
Once the paint is dry, gentle buffing with a soft cloth can add a subtle sheen for a polished and professional result.
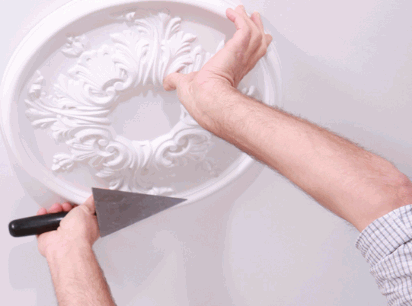
Filling in any gaps or imperfections around the plaster ceiling rose ensures a seamless and polished integration with the surrounding ceiling surface, creating a visually appealing result.
When repairing gaps or imperfections in your ceiling, it's important to first assess their size and depth. For smaller gaps, a quick-drying filler like caulk may suffice, while larger imperfections may require a joint compound or plaster.
Before applying any filler, make sure to clean the area around the ceiling rose to remove any dust or debris. Carefully apply the chosen filler, using a putty knife to smooth it out and blend it seamlessly with the surrounding surface. Once dry, sand the filled areas to achieve a smooth finish.
Finally, paint or finish the ceiling to match the surrounding surface, ensuring that the repair seamlessly merges with the existing décor.
Find out more: How To Repair Cracks In Plaster
Sanding down the edges of the plaster ceiling rose ensures smooth and flawless transitions with the ceiling surface, contributing to its overall aesthetic appeal and visual cohesion.
This process can be accomplished using fine-grit sandpaper. Gently work around the edges to achieve a seamless blend. It is advisable to start with a lighter touch and gradually increase pressure as needed.
After sanding, wipe the surface clean to remove any dust particles. For a professional finish, consider using a damp sponge to smooth any remaining rough areas. Applying a primer or sealant can help enhance the durability and appearance of the plaster ceiling rose.
The painting of a plaster ceiling rose adds the final decorative touch, allowing for customization and color coordination to complement the overall interior design scheme.
Before painting your ceiling rose, it's crucial to properly prepare the surface. Begin by cleaning it thoroughly to remove any dust or debris, creating a smooth and even base for the paint.
For best results, use a high-quality primer specifically designed for plaster surfaces. This will promote adhesion and increase the durability of the paint.
When choosing the paint, consider the desired aesthetic and select a finish that suits it, such as matt, eggshell, or gloss. For a more ornamental look, you may also want to explore specialized metallic or faux finish paints.