
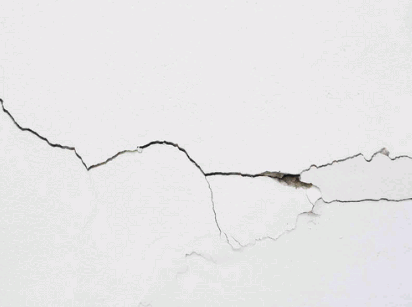
If you’ve ever noticed cracks in the plaster of your walls or ceilings, you’re not alone. Cracks in plaster can be unsightly and even cause structural issues if left unaddressed.
In this article, we’ll explore the different types of plaster, how to identify them, and the tools and materials needed for repairing plaster cracks. We’ll also provide you with a step-by-step guide for repairing cracks in plaster, along with tips for preventing them in the future. Whether you’re a DIY enthusiast or simply want to understand the process, this article has you covered. So, let’s get started!
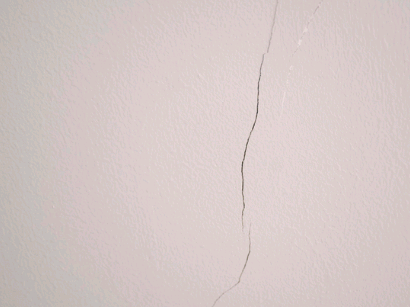
Table of Contents
Cracks in plaster can be caused by various factors including structural issues, aesthetic deterioration, and damage due to environmental conditions.
Structural issues such as foundation settlement, inadequate support, or poor construction can lead to the development of cracks in plaster.
Fluctuating humidity levels and temperature changes due to environmental factors can cause the plaster to expand and contract, leading to cracks over time.
It's essential to regularly inspect and maintain the structural integrity of the building to prevent the occurrence of cracks.
Proper maintenance, timely repairs, and the application of protective coatings can help extend the lifespan of plaster surfaces and minimize the risk of cracks.
There are several types of plaster commonly used in construction and renovation. These include Lime Plaster, Gypsum Plaster, and Cement Plaster. Each type offers distinct properties and applications.
Lime plaster is a traditional material known for its durability and compatibility with historical surfaces. It often requires specialized repair methods and products to address cracks and damage effectively.
One of the unique properties of lime plaster is its breathability, allowing moisture to escape. This makes it a suitable choice for older buildings. However, when it comes to restoration, it's crucial to understand the composition of lime plaster. Using the wrong materials can result in further damage.
Repair techniques for lime plaster often involve applying a fresh coat, and carefully matching the texture and color to seamlessly blend with the original surface. In these cases, products such as natural pigments and additives are essential in achieving a cohesive finish.
Gypsum plaster is a popular choice for modern construction and renovation projects. It offers a smooth finish and ease of application, but it requires specific repair methods and products to effectively address cracks and surface damage.
To achieve successful repair and restoration, it is crucial to have a thorough understanding of the characteristics of gypsum plaster. Its unique composition allows for effortless blending with existing surfaces, making it an ideal choice for fixing cracks and blemishes.
When addressing surface damage, products such as gypsum-based fillers and jointing compounds offer exceptional durability and compatibility with the plaster. By using proper application techniques and suitable products, repairs can seamlessly integrate with the existing gypsum plaster, preserving the structural integrity and aesthetic appeal of the surface.
Cement plaster is known for its strength and versatility in various construction applications. However, it can be prone to cracks and surface damage, requiring specialized repair methods and suitable products to effectively address these issues.
Cement plaster is also known for its structural strength, making it a reliable option for both interior and exterior surfaces. To ensure the integrity of the structure, it's crucial to address any cracks or surface damage with precision and thoroughness. This involves carefully assessing the extent of the damage and using compatible products for seamless repairs and long-lasting results.
Identifying the type of plaster used in a building or renovation project is a crucial step in determining the appropriate repair and restoration methods. This process often requires professional advice and assessment.
The first step is to carefully examine the plaster's texture, color, and composition. Different types of plaster, such as lime, gypsum, or cement-based, have distinct characteristics that can be identified through visual inspection and chemical testing.
Understanding the specific type of plaster is essential for selecting the right materials and techniques for restoration. This ensures that the repairs are durable and compatible with the original construction. In cases where uncertainty persists, consulting experienced professionals is invaluable for accurate assessment and successful restoration work.
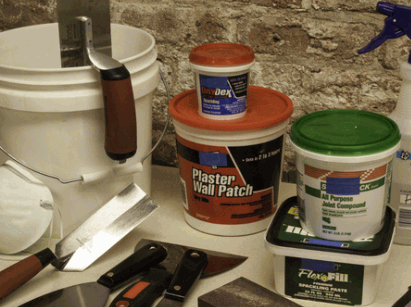
Repairing plaster cracks requires a set of specialized tools and materials, including plaster of Paris, joint compound, putty knife, sandpaper, and paint, along with professional advice on the appropriate techniques and equipment.
When it comes to repairing cracks, the materials you use play a crucial role. For larger cracks, Plaster of Paris is a must, while joint compound is perfect for smaller ones. To apply and smooth out these materials, a putty knife is essential. And for achieving a smooth finish, don't forget to use sandpaper.
When it's time to paint, make sure to choose a color that matches the existing surface. This will ensure a seamless repair that blends in seamlessly. And for the best results, it's always a good idea to seek professional advice. They can guide you on the correct application of materials and techniques, resulting in a longer-lasting and visually appealing finish.
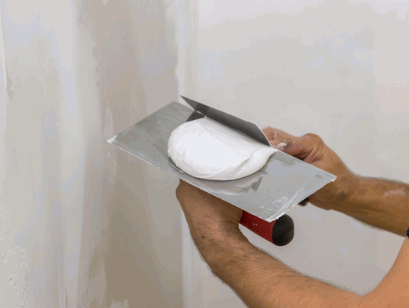
Plaster of Paris is a versatile material commonly used for repairing plaster cracks due to its quick-drying properties and compatibility with various surfaces. This often requires specific techniques and professional advice for optimal application.
Highly regarded for its ability to form a sturdy and long-lasting bond with various materials, plaster of Paris is an ideal option for fixing cracks in walls, ceilings, and other plaster surfaces. Its lightweight composition also makes it perfect for intricate detailing and molding.
However, achieving seamless repairs with the plaster of Paris requires careful consideration of the water-to-powder ratio and an understanding of its setting time. Seeking professional guidance can greatly aid in this process, ensuring optimal results and durable repairs.
A joint compound is crucial for maintaining the structural integrity of plaster walls and ceilings. Its ability to fill and bridge cracks ensures a strong and seamless repair.
Proper application, including feathering and sanding, is crucial for achieving a smooth finish. Seeking professional advice is recommended to assess the damage and choose the right type of joint compound for the job.
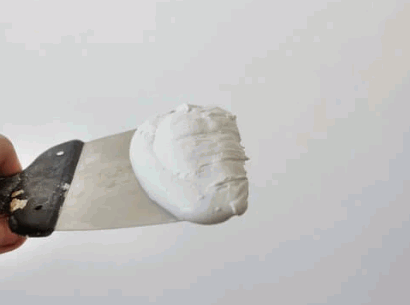
A filling knife is an essential tool for repairing plaster cracks. It facilitates precise application and smoothing of repair materials, often requiring specific techniques and professional advice for optimum results.
The filling knife's flat, flexible blade and sturdy handle make it easy to apply and manipulate repair compounds. This results in a seamless blend with existing plaster.
The technique of cross-hatching and feathering allows for a smooth transition between the repair material and the surrounding surface. This utilizes the precision of the filling knife for a flawless finish. Seeking professional advice is crucial, especially for extensive or structural damages, to ensure safety and long-lasting results.
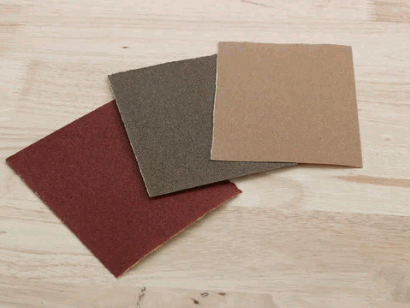
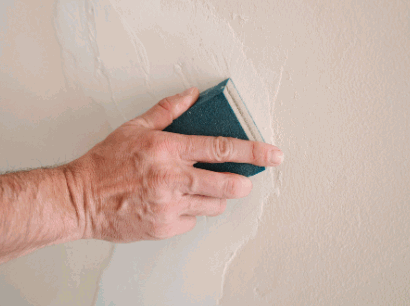
Sandpaper is an essential tool for refining and smoothing repaired plaster surfaces, requiring specific techniques and professional advice for achieving a seamless finish and optimal restoration.
When it comes to repairing plaster cracks, the final stages are crucial. This is where sandpaper comes in, as it effectively removes excess materials, evens out rough patches, and enhances the overall aesthetic appeal.
Choosing the right type and grit of sandpaper is important, with finer grits being ideal for achieving a polished, smooth surface. Proper application techniques, such as using light pressure and consistent strokes, are also essential to avoid over-sanding and maintain the integrity of the plaster.
For best results, it's recommended to seek professional advice in selecting the appropriate sandpaper and ensuring that the repair work meets industry standards for quality and longevity.
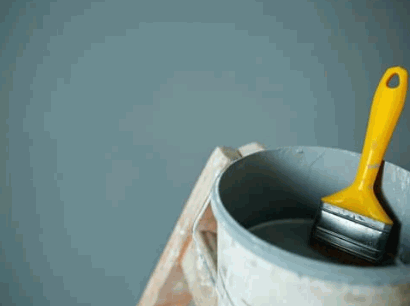
Selecting the appropriate paint for repaired plaster surfaces is essential for achieving a uniform and visually appealing finish. This often requires specific techniques and professional advice for optimal application.
When choosing paint for cracked plaster, it's crucial to consider the type of plaster and the underlying cause of the cracks. This will help determine if specific primers or sealers are needed for proper adhesion and durability. Seeking professional advice can be beneficial in selecting the right paint type, finish, and application methods to seamlessly blend the repaired surface with the surrounding areas for a flawless result.
Techniques like feathering out the paint and applying thin layers can also aid in achieving a smooth and uniform finish, making the repaired surface virtually indistinguishable from the original plaster.
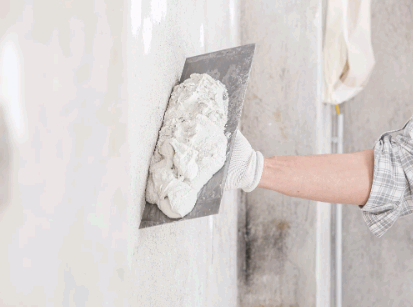
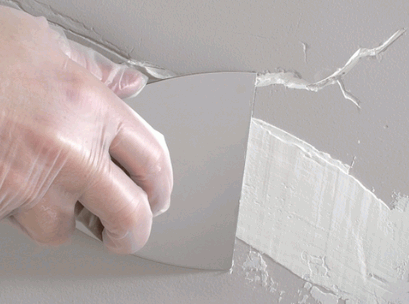
Repairing plaster cracks involves a systematic process, including surface preparation, crack filling, sanding, application of additional plaster, and painting, resulting in a professional-looking and durable restoration.
To begin, thoroughly clean the area around the crack to remove any loose debris and dirt. Use a putty knife to widen the crack slightly before filling it with a joint compound or plaster patching compound.
Once the compound has dried, sand the area smooth. Apply a thin layer of plaster over the repaired crack to blend it with the surrounding surface, ensuring a seamless finish.
Complete the repair by applying matching paint to the patched area, seamlessly integrating the restored section with the rest of the wall or ceiling.
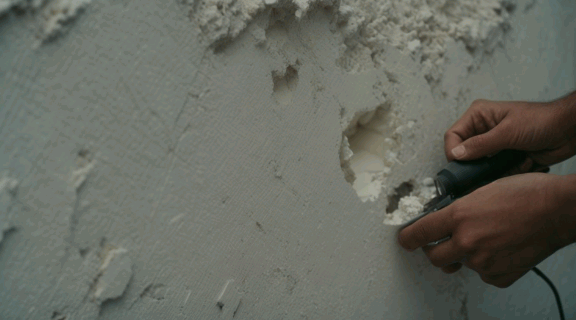
Preparing the surface for plaster crack repair involves thorough cleaning, removal of loose debris, and the use of appropriate tools and equipment to ensure a smooth and stable base for the restoration process.
This initial step is crucial as it sets the foundation for the effectiveness and longevity of the repair. Cleaning the surface ensures the removal of any contaminants or substances that could interfere with the adhesion of the new plaster.
Debris removal is equally important as any loose material left behind could compromise the integrity of the repair. Utilizing specific tools and equipment, such as wire brushes, scrapers, and vacuum attachments, aids in achieving a clean and debris-free surface, promoting optimal results in plaster crack repair.
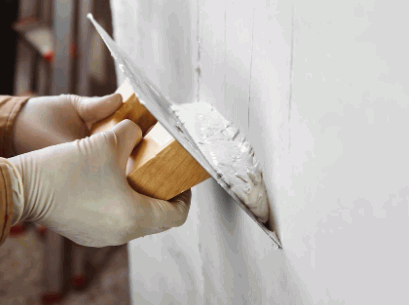
Filling in the cracks of plaster involves applying a suitable patching material such as joint compound, putty, or filler to ensure a seamless and durable repair that addresses the underlying damage effectively.
These materials are chosen for their adhesive properties and ability to effectively fill in and bond with the existing plaster.
Joint compound, often used as a finishing material for plasterboard, is a popular choice due to its smooth consistency and ability to be sanded to a seamless finish. Putty, on the other hand, is preferred for smaller cracks and imperfections, offering easy application and quick drying. A filler, commonly used for filling holes and cracks, is also suitable for repairing plaster, providing a strong and smooth patch.
Each material has its own techniques of application, requiring attention to detail and precision to achieve a flawless result.
Sanding the repaired plaster surface is essential for leveling and smoothing the applied patching material, ensuring seamless integration with the surrounding surface and a visually appealing finish.
This process involves carefully using various grades of sandpaper to achieve the desired smoothness without creating uneven areas or causing damage to the surrounding wall.
Starting with a coarser grit sandpaper to remove any excess material and uneven edges, followed by progressing to finer grits to achieve a smooth and even surface is a key technique.
It's important to remain patient and attentive to detail during the sanding process, as it significantly contributes to the overall quality of the plaster crack repair.
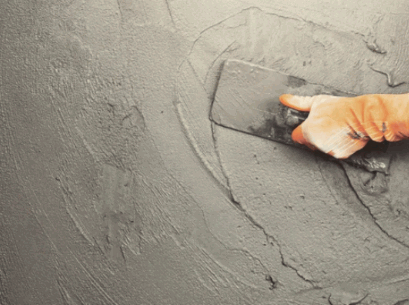
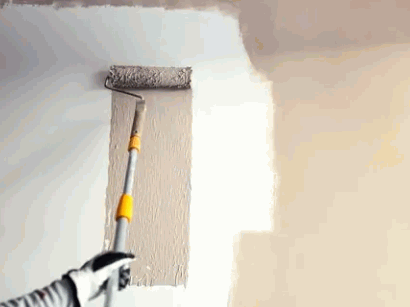
Applying a second coat of plaster, such as a skim coat or additional joint compound, is essential for reinforcing the repaired area, addressing minor imperfections, and achieving a seamless restoration.
This second application allows for further refinement and smoothing of the surface, ensuring that any remaining irregularities or slight unevenness from the initial coat are addressed.
When using a skim coat, it's crucial to apply it thinly and evenly, feathering the edges to blend it seamlessly with the surrounding surface. When applying an additional joint compound, it's important to maintain a consistent thickness for a uniform finish. Both these techniques contribute to the structural integrity and aesthetic appeal of the repaired area.
Explore: How To Plaster Skim A Wall
Painting the restored plaster surface involves the application of undercoat and suitable paint using brushes or rollers, ensuring a uniform finish and seamless integration with the surrounding area.
The undercoat is an essential step in preparing the surface for painting. It creates a smooth base for the paint to adhere to, ensuring a long-lasting finish.
After applying the undercoat, it's important to choose a suitable paint that matches the existing color and texture. Using brushes or rollers allows for even coverage and helps blend the repaired area with the rest of the wall.
When painting, be sure to feather the edges of the paint to seamlessly blend it with the surrounding surface. This will ensure that the repaired area is indistinguishable from the rest of the wall, resulting in a professional-looking finish.
Preventing plaster cracks requires proactive measures such as addressing structural issues, controlling humidity levels, and adhering to a regular maintenance schedule, ultimately ensuring the long-term integrity of plaster surfaces.
To prevent cracks in plaster, it's important to address any structural issues like foundation problems or shifting walls. This will reduce stress on the plaster. Additionally, controlling humidity levels through proper ventilation, dehumidifiers, or air conditioning can help maintain its stability.
Regular maintenance is also crucial in prolonging the lifespan of plaster. This includes inspecting for small cracks and repairing them promptly to prevent larger issues from developing.
Calling a professional for plaster crack repair is advisable in cases of extensive damage, structural concerns, or when faced with challenging repair scenarios. This ensures the application of expert techniques and advice to achieve optimal results.
Expert involvement is particularly beneficial for repairing cracks in historical or ornate plaster. Precision and preservation are crucial in these delicate situations. Professionals can also address underlying causes such as structural issues or moisture infiltration, preventing future damage.
Their expertise minimizes the risk of common DIY mistakes that could exacerbate the problem. Seeking professional assistance ensures a thorough assessment of the plaster condition and the use of appropriate materials. This ultimately enhances the longevity and aesthetics of the repaired surface.