

Are you looking to upgrade your lighting fixtures to more energy-efficient options? Retrofit LED recessed lighting might be the perfect solution for you.
We explore what retrofit LED recessed lighting is, the benefits of using it, the different types available, and the step-by-step process of installation. We will also provide you with some tips, common mistakes to avoid, and safety precautions to take when installing retrofit LED recessed lighting in your home or office.
Let's dive in and shed some light on this topic!
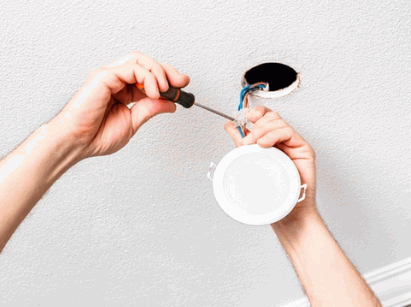
Table of Contents
Retrofit LED recessed lighting involves upgrading existing light fixtures with energy-efficient LED technology, which can be seamlessly integrated into your current housing without major modifications.
LED downlights are a popular choice for retrofitting, offering a sleek and modern look while significantly reducing energy consumption. By converting traditional recessed lights to LED, you not only improve the quality of light in your space but also lower your electricity bills and decrease your carbon footprint.
One of the key benefits of LED technology is its longevity, lasting much longer than traditional bulbs. This means less frequent replacements and maintenance, providing you with hassle-free illumination for years to come.
The benefits of using retrofit LED recessed lighting extend beyond mere energy efficiency; these lights offer enhanced brightness, are kinder to the environment, and contribute to a more sustainable living space.
Check out: What Are The Advantages Of LED Lighting

There are several types of retrofit LED recessed lighting available, each designed to fit different lighting setups and preferences to ensure optimal illumination in any space.
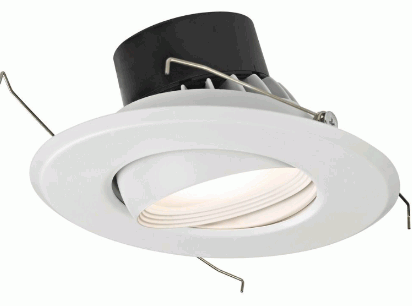
Gimbal retrofit LED recessed lighting fittings offer adjustable angles, making them perfect for highlighting specific areas or objects in a room.
These innovative fittings can be easily adjusted to direct light exactly where it's needed, providing versatility in illumination placement. Whether you want to focus on a piece of art, a reading nook, or a kitchen island, gimbal lights can be positioned to suit your specific lighting needs. Their flexibility also makes them ideal for retail spaces, galleries, or museums where the lighting requirements may change frequently. The ability to swivel and tilt the light source ensures that you can achieve the desired ambiance and accentuate key features within a space.
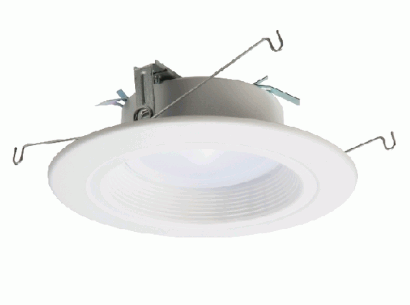
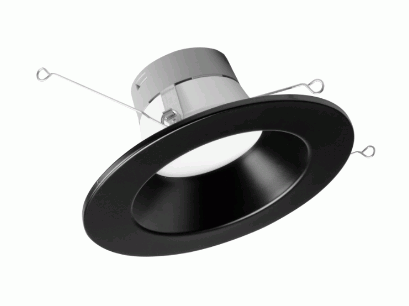
Baffle retrofit LED recessed lighting is designed to reduce glare and provide soft, comfortable lighting, making it ideal for living spaces where ambience is key.
The baffle design in these fixtures consists of a series of concentric rings or baffles, strategically positioned within the light housing. These baffles serve a dual purpose - they help to dissipate and control the direction of light, while also reducing any harsh glare that might be emitted. By doing so, the baffle design ensures that the light is spread evenly and smoothly across the room, creating a pleasant and inviting atmosphere. This makes them perfect for areas like bedrooms, dining rooms, and lounges, where creating a cosy and welcoming ambience is crucial.
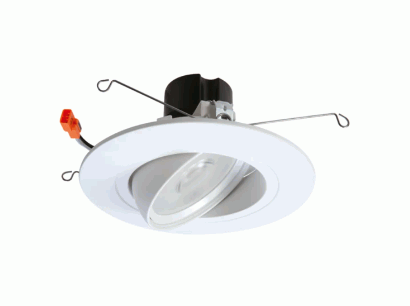
Eyeball retrofit LED recessed lighting features a directional design, allowing for targeted spotlighting that can be adjusted to highlight specific features or areas.
This type of lighting is ideal for creating dramatic effects in a room by emphasizing artwork, architectural details, or specific zones. The adjustable nature of eyeball lights enables users to direct the light exactly where it's needed, offering flexibility in illumination.
Unlike other types of recessed lighting, such as fixed or gimbal designs, eyeball lights provide a greater range of motion and focus. This makes them perfect for accentuating key elements in a space, whether it's a decorative piece or a functional area that requires extra luminosity.
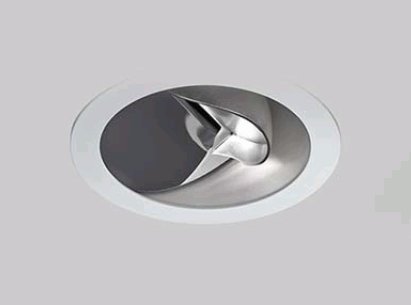
Wall wash retrofit LED recessed lighting provides even illumination across surfaces, making them perfect for accentuating architectural features or creating a wash of light along a wall.
By strategically placing these lights, various elements of a room, such as textures, colours, or artwork, can be highlighted effectively. The purpose of wall wash lights is not only to provide functional lighting but also to add depth and dimension to the space. When used correctly, they can visually expand a room, create a cosy ambiance, or draw attention to specific areas. Whether in residential homes, commercial buildings, or galleries, wallwash lights play a crucial role in transforming the aesthetic appeal of any environment.
Retrofit LED recessed lighting kits simplify the upgrade process, offering a DIY-friendly solution that includes everything needed for installation and ensures a seamless transition to energy-efficient lighting.
These kits typically consist of LED retrofit modules, trim pieces, and compatible housings, making it convenient for homeowners to revamp their lighting without extensive electrical work. The comprehensive nature of the kits means that users do not have to worry about sourcing separate components or tools, simplifying the entire retrofit process. Plus the lighting fixtures themselves, installation guides, and mounting hardware are commonly included in these kits, equipping users with all the necessary resources to complete the project independently.
Before starting the installation, gather all necessary materials and tools, and use a checklist to ensure you have everything required for the process.
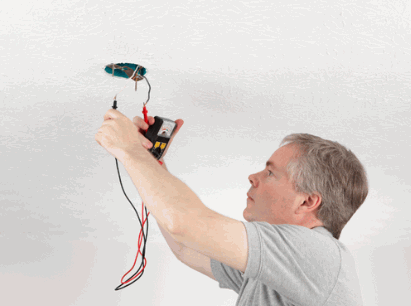
Ensure safety by turning off the power to the existing light fitting before beginning any work on electrical wiring.
Before attempting to work on the electrical components of a light fitting, it is crucial to take the necessary precautions to prevent any accidents or injuries. Turning off the power supply is the first and most vital step in this process. You can do this by locating the circuit breaker box in your home and identifying the correct breaker corresponding to the light fitting. Once you have identified the right breaker, switch it off to cut off the electrical supply to the fitting.
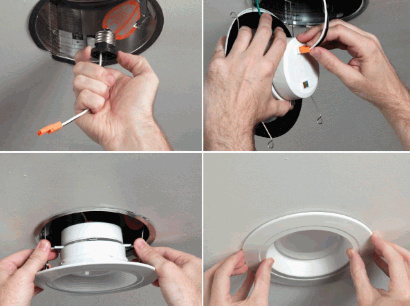
Carefully remove the existing light fitting from its housing, ensuring you do not damage any surrounding materials.
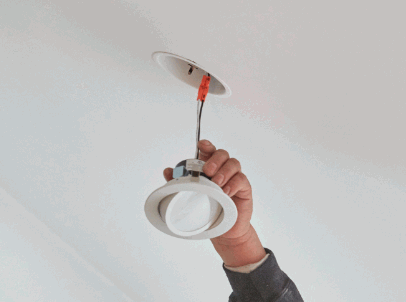
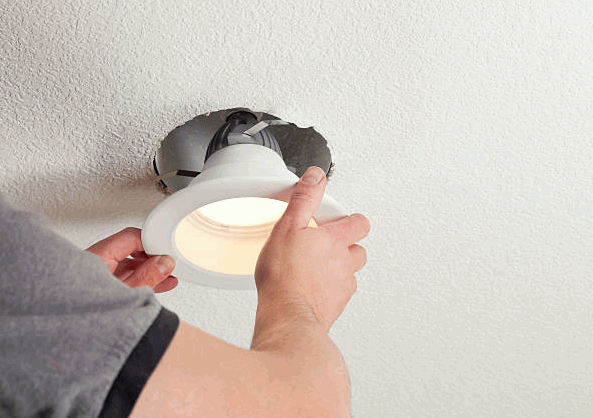
Install the retrofit LED recessed lighting by securing the new fixture in place using torsion springs or clips provided in the retrofit kit.
Begin by first turning off the power supply to the existing recessed fitting.
Be sure to follow the manufacturer's instructions for any additional securing mechanisms provided.
Connect the electrical wiring using the appropriate adaptors, such as the E26 adaptor or TP24 connector, to ensure a secure and safe electrical connection.
When wiring your electrical components, it is crucial to select the correct adaptors and connectors to guarantee a reliable setup. Utilising the wrong adaptors can lead to loose connections, which pose a significant safety hazard. Properly securing the connections will not only enhance safety but also optimise the functionality of your electrical system. Therefore, pay close attention to the compatibility of the adaptors and connectors to avoid any mishaps. Remember, a secure connection is the cornerstone of a dependable electrical network.
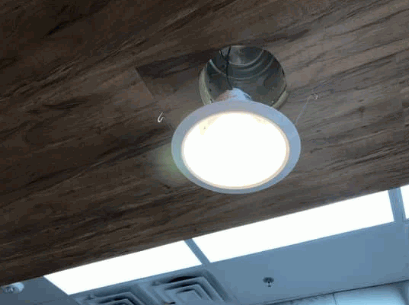
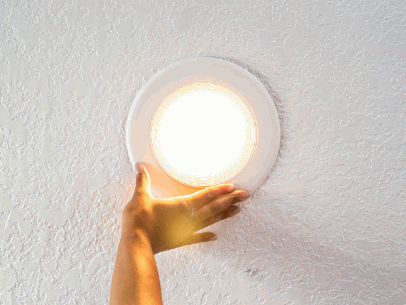
Once the installation is complete, test the light to ensure it operates correctly and make any necessary adjustments to achieve the desired brightness and positioning.
When installing retrofit LED recessed lighting, consider these tips to enhance your DIY experience, whether working on an exterior project like garden beds or dealing with the challenges of a vaulted ceiling.
One crucial consideration when tackling an exterior lighting project is the weather resistance of the fixtures. Opt for LED recessed lights that are rated for outdoor use to ensure longevity and safety in outdoor environments.
For spaces with vaulted ceilings, it's essential to plan for adequate accessibility during installation. Utilise adjustable fixtures or consider hiring a professional to navigate the unique challenges posed by high ceilings.
Avoid common mistakes when installing retrofit LED recessed lighting by following a detailed tutorial and learning from resources like Thrift Diving to ensure a smooth and successful installation.
One of the most crucial aspects to pay attention to is the proper measurements when cutting the ceiling for the installation. Making accurate measurements will prevent any gaps or unevenness in the final result.
When dealing with the electrical wiring, ensure that all connections are secure and that the power is switched off before beginning any work. This precaution is essential to avoid potential safety hazards and damage to the fixtures.
For more in-depth guidance on these steps and other important considerations, explore online tutorials from reputable sources like Family Handyman and This Old House. These platforms offer detailed explanations and visuals to help you successfully complete your project.
Taking proper safety precautions is crucial when installing retrofit LED recessed lighting, especially when dealing with electrical wiring and using various tools.
One of the most important safety measures is to always switch off the power supply to the area where you are working. This simple step can prevent electric shock accidents.
Using insulated tools is essential to avoid any potential electrical hazards. When handling electrical wiring, be sure to do so with caution, following manufacturer guidelines and ensuring the proper connections.